

Monday, May 23, 2011
First Ripe Tomatoes


Saturday, May 21, 2011
CROP LOOKS GOOD SO FAR!!!!!!!


 |
| Indian Stripe |
Just look at the fruit set!
 |
| Park's Whopper |
If all goes well we will have fresh home grown ripe tomatoes in a week to ten days.
Wednesday, May 11, 2011
TRAINING THE TOMATO PLANTS!
I only grow indeterminant tomato plants which means they will continue to grow all season long. The growing frames I have constructed are only 16' long and there are eight plants on either side of the frame. Therefore, the plants must be trained upwards so that each one will use its designated two feet on the frame. I believe that training the plants upward is by far the best method of supporting them. The only tool necessary for this process is a pair of good sharp sisors.

This photo shows a sucker being removed
 This photo depicts a
ABOUT SUCKERS
When the plants are about two feet tall I pinch off all of the suckers and tie the main growing stem to the first rung of the frame. Once it is secure I allow the plant to split into two or three growing stems by the time they reach the second rung of the frame. I then remove all of the suckers up to the second rung and tie the three growing stems securely to the frame at the second level.

This photo shows a sucker being removed
This photo depicts aproperly trained plant
on the frame. All
suckers have been
removed and the
plant is going up
the frame with 3
strong growing
stems
A Sap Sucker is a bird akin to the woodpecker family. They get their name from sucking the sap out of trees. A Tomato sucker also sucks the energy out of the tomato plant. At the axil of the tomato leaf (where the leaf is attached to the growing stem) the plant will naturally produce a sucker. If not removed this new growth will produce a whole new growing stem and it will keep multiplying throughout the growing season. Many growers simply let the plant go and multiply as many suckers as it can. A plant left alone and not pruned of suckers will become bushy and much of the plants enegery will be used to produce new green growth instead of producing new blooms and tomatoes. The plant will become so thick that it will be difficult for it to recieve adequate ventilation and that will lead to disease. Properly pruned of suckers, the three or four main growing stems will produce a bountiful harvest of much larger fruit. The unpruned plant will probably produce more tomatoes, but, in my opinion, they will be much smaller and of inferior quality.
When the plants set the first tomatoes, I then remove all of the leaves on the stem up to the first rung. Don't worry about hurting the plant by cutting off the bottom leaves. If left on the plant they will yellow and die anyway as the season progresses.
When the plants set the first tomatoes, I then remove all of the leaves on the stem up to the first rung. Don't worry about hurting the plant by cutting off the bottom leaves. If left on the plant they will yellow and die anyway as the season progresses.
Thursday, April 28, 2011
Young plants have had a hard life so far

 One of my favorite stories told by my grandmother in order to inspire me, when I had had a particularly hard day or a run of bad luck in life, dealt with her "hard times" growing up. She would say, " You don't know how lucky you are. When I grew up we had to walk barefooted two miles each way to and from school and it was uphill both ways." She would explain that living through adversity would make me stronger and a better person when I grew up. That story reminded me that my poor little tomato plants have had a really tough time at a very young age and all have made it through the adversity. They have suffered through two hail storms, six inches of rain in a three day period, and high winds gusting up to 45 miles per hour and they have all survived. I am confident that this adversity will make them stronger when they grow up.
Tuesday, April 26, 2011
Support the Vines


It is amazing how big one of these little plants can get. All twenty varieties I have planted this year are indeterminate tomatoes. This means that the vines will continue to grow and produce as long as those vines are properly supported. There are as many support systems for tomatoes as there are mosquitoes in the Delta. Forget the little wire baskets that are sold in the box stores. They are not big or strong enough.
For the four cherry tomato plants I am growing this year I will use the traditional concrete wire mesh baskets. My associate, Barbara, graciously gave me the baskets which were used by her father, a well known tomato gardener in North Carrollton. The baskets are five feet tall and are stackable. The goal will be for each cherry to be supported by two baskets stacked on top of each other. The ground level basket will be steadied with two four foot stakes driven into the ground like tent pegs. Hopefully this method will result in cherry tomatoes being produced from ground level all the way to the top.
For the four cherry tomato plants I am growing this year I will use the traditional concrete wire mesh baskets. My associate, Barbara, graciously gave me the baskets which were used by her father, a well known tomato gardener in North Carrollton. The baskets are five feet tall and are stackable. The goal will be for each cherry to be supported by two baskets stacked on top of each other. The ground level basket will be steadied with two four foot stakes driven into the ground like tent pegs. Hopefully this method will result in cherry tomatoes being produced from ground level all the way to the top.
My main bed contains sixteen plants, eight on each side of a frame supported by the steel posts which are eleven feet tall. The lateral supports are sixteen foot long PVC plumbing pipes attached to the posts with eleven-inch zip ties. In the past I have had to utilize my boy scout training in knot tying to construct this structure. Technology has made all that early training redundant with the invention of zip ties. These small plastic ties are a wonderful invention. They will hold anything together and are super strong. They are not biodegradable and must be removed after use.
After the first three lateral pipes are attached, I place small bamboo training sticks at the base of each tomato to train it to grow up the frame. Each plant will have its own two foot area of the frame as it grows upward. I use sisal twine to tie the plant. Never use a slip knot and be sure that the knot does not choke the plant. I will remove the training sticks when the plants are tall enough to tie to the first rung of the frame. I remove all the suckers up to the first set of blooms and after that stage I try and let each plant have three growing stems.
Tuesday, April 19, 2011
Mulch the Tomatoes
 One of the most important steps in producing a good tomato crop is mulching. It is really important and I highly recommend to all who plant tomatoes to take the time and energy to protect the tomato plants with a good mulch. In fact, I think that if you plant a tomato and mulch it properly you really don't have to do much else but water the plant to get a decent crop. This year I have used red pine bark. Other growers use pine straw, wheat straw, hay, and some just use black plastic. Any organic loose material will do- grass clippings, leaves or even gin trash. Be sure the mulch surrounds the plant and that it is loose enough not to form a seal over the ground. I try and have four to six inches of mulch cover the entire bed. The plants need to get water down to the roots and to breath which is why I don't recommend controlling the weed problem with a plastic cover.
The first and obvious benefit to mulching is weed control. Never cultivate the tomato plant. No hoeing, digging or tilling around the plant is allowed. The lateral roots are shallow and digging around the plant will only cut off its arteries and veins which take in all the moisture and nutrients in the soil. If you don't mulch to control the weeds, all your time will be spent pulling weeds
 Mulch also helps control the temperature and moisture in the soil. In hot weather mulch helps to keep the soil as cool as possible. Likewise mulch will keep the soil temperature level during cold snaps (as if we get cold snaps in the Delta). On a hot day just take the temperature above ground and compare it to the temperature of the soil beneath the mulch. It will be five to ten degrees cooler under the mulch.
Disease control, to me, is the most important reason to properly mulch a tomato crop. Most diseases effecting tomatoes in the Delta are soil borne and are caused by allowing the tomato leaves to contact the soil. A good mulch prevents the soil from splashing up and hitting the leaves of the plant. If you fail to mulch, the underside of the leaves will be covered with dirt after a hard rain. The heat and humidity that follows a rain in the Delta is the perfect breeding ground for fungus which causes the dreaded blight. I will discuss organic and chemical control of fungal diseases later in this blog; however, suffice it to say, the first defense against this killer problem is a good mulch.
NEXT--- SUPPORTING THE TOMATOES
Monday, April 11, 2011
IF IT WAS GOOD ENOUGH FOR POCAHONTAS IT'S GOOD ENOUGH FOR ME!!!
HOW I PLANT MY TOMATOES
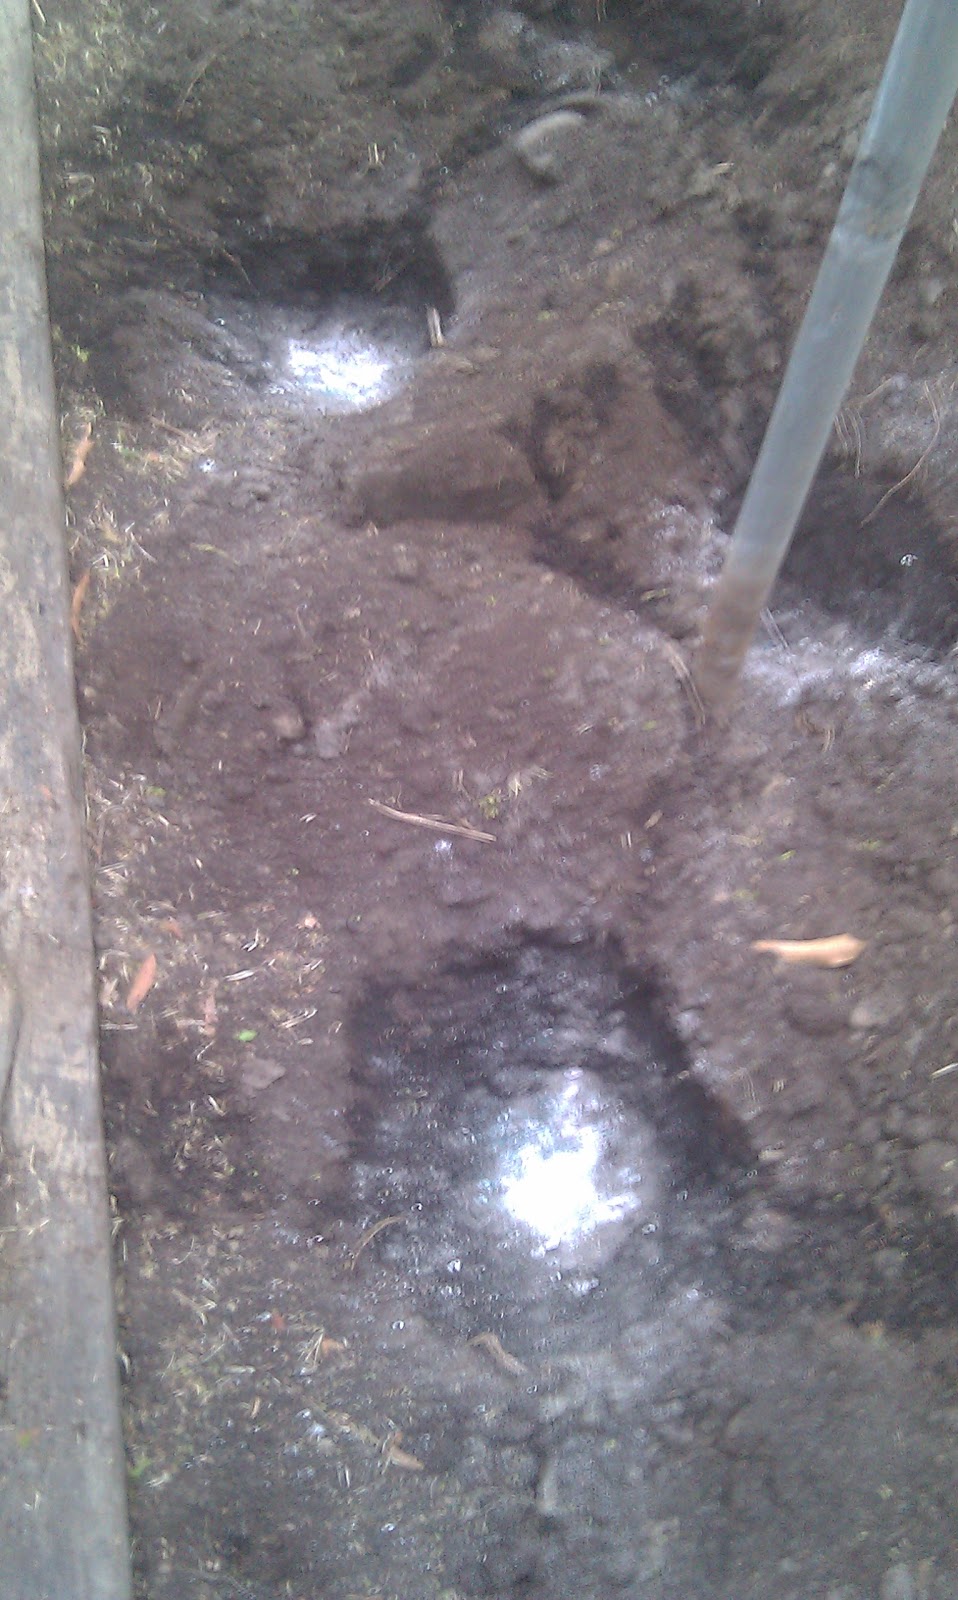
 There are many different theories about the proper method of planting tomatoes. I have tried most and have settled on a method that seems to work best for me in the Mississippi Delta. As stated previously, I believe that a good strong root system is vital for the hot humid Delta growing season. At planting time the average height of my plants is about two feet. A deep hole is a "must" to bury the long stems. Some believe my plants are too "leggy" and that a shorter, stouter plant is preferred, but I disagree. I dig a hole at least two feet deep straight down and plant the tomato vertically. I remove all of the leaves of the plant up to the top cluster. Pulling the leaves downward to the base also skins the stalk (like peeling a banana). This is important because all that part of the stem which is underground forms lateral roots from the skinned portion of the stalk that can radiate sideways as much as six feet--- helping the plant take in water and the nutritents in the soil.
 As is shown in the photograph I have added some supplements in the very bottom of each deep hole. This year I have added a heaping handfull of oak wood ashes from our fireplace, about 1/2 cup of bone meal, 1/4 cup of Epsom Salts (magnesium sulphate), a generous sprinkling of Osmocote (a time release fertilizer) and about two heaping table spoons of MiracleGrow (quick release fertilizer). I mix up the supplements and then cover the bottom with about six inches of soil so as not to burn the roots.
In the past I have also added fresh caught half-pound bass which decompose during the growing season furnishing additional nutrients. I figured that if it was good enough for Pocahontas, it would be good enough for me. I have read that some growers also add Tums or powered milk to supply calcium and pennies to supply the trace element of copper to the soil. This year my fishermen friends, Cliff Camp and Anthony Cascio, failed me in providing the fresh bass.
 Don't be afraid to skin the stalks. It will not hurt the plant which will recover very quickly after planting,

NEXT-- MULCH THE TOMATO BED

In the past I have also added fresh caught half-pound bass which decompose during the growing season furnishing additional nutrients. I figured that if it was good enough for Pocahontas, it would be good enough for me. I have read that some growers also add Tums or powered milk to supply calcium and pennies to supply the trace element of copper to the soil. This year my fishermen friends, Cliff Camp and Anthony Cascio, failed me in providing the fresh bass.


Plant the tomato all the way down in the bottom of the hole with only the last cluster of leaves above ground. I mound the plant by pushing the dirt up around the stem and then dig a trench or moat all the way around the new planting. This allows the water to pond around the plant to be directed downward to the roots. It is best to plant on a cloudy day or in the late evening. After planting water the new plant making sure that it is soaked all the way down to the roots.
NEXT-- MULCH THE TOMATO BED
Subscribe to:
Posts (Atom)